
In the realm of niche hobbies, the assembly of DIY synth kits has begun to chime louder which reveals the pure tonal bliss of immersive sound creation. This article will light up the path to your pulsating music dreams, presenting a comprehensive guide on the artful process of piecing together DIY synth kits. With an ear on the past and an eye on the future, this engaging journey will strum chords that meld science, creativity, and patient craftsmanship all into one captivating synthesis. So wave goodbye to any notion of your run-of-the-mill hobbies as you ride the audio wave into envisaging, understanding, and creating your personal harmonized world.

Understanding Your DIY Synth Kit
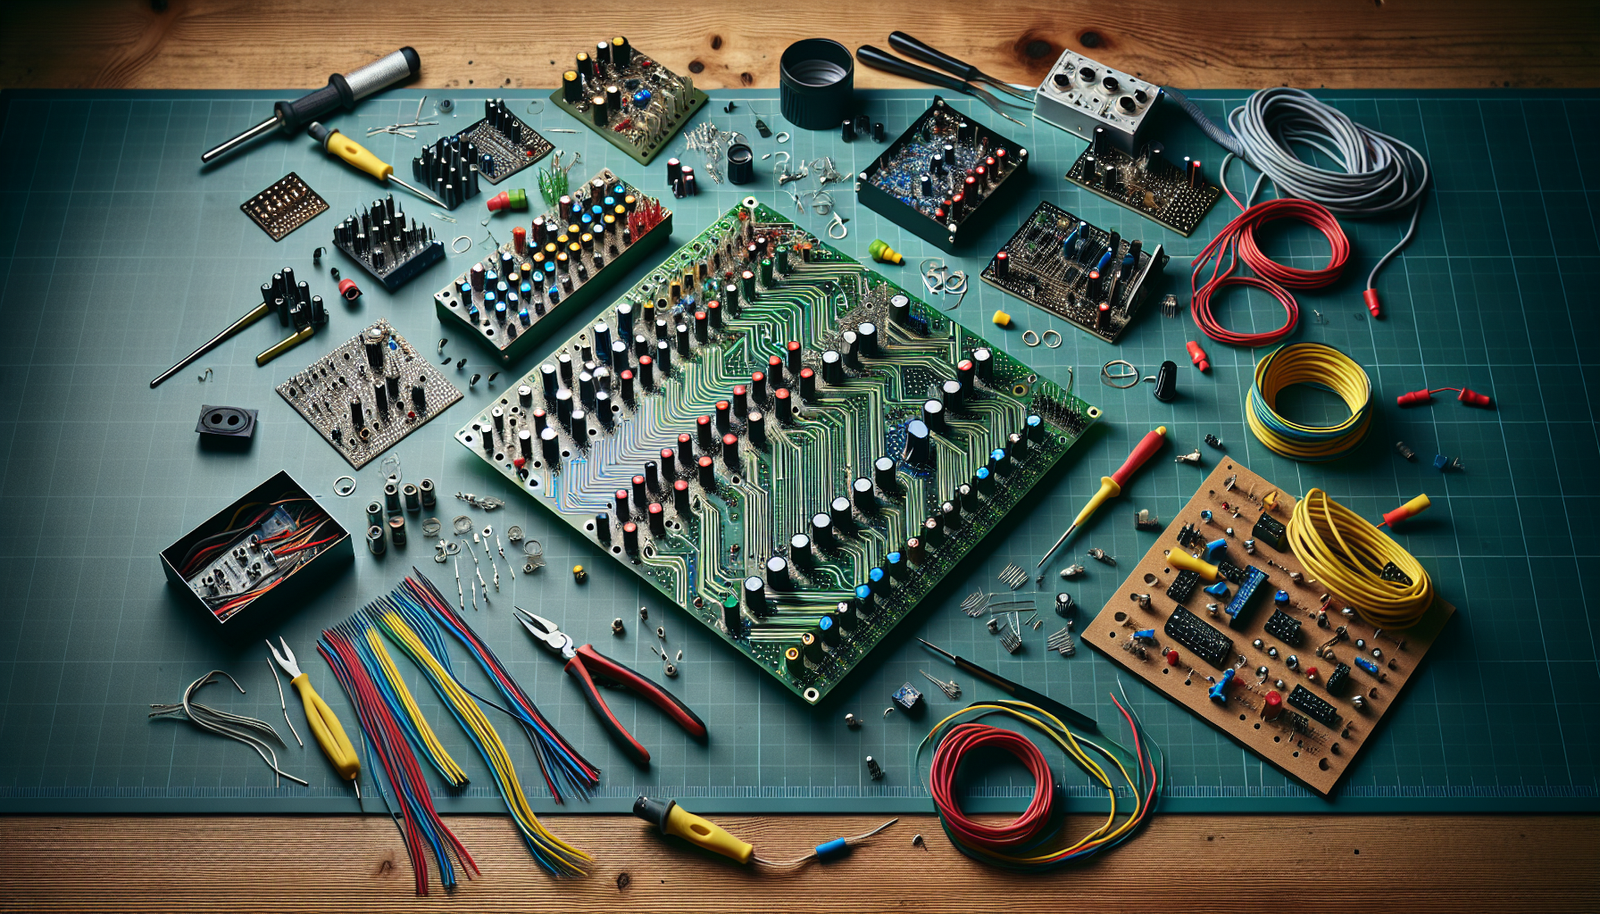
Getting to grips with every part of your DIY synth kit can seem overwhelming, but don’t worry, it doesn’t have to be. Here’s what you need to do.
Identifying Components
Your synth kit will include several different components. These might range from resistors, capacitors, and transistors to potentiometers, switches, and power supply units. Take a moment to lay out all the components on a clean surface and familiarize yourself with them.
Understanding Functions of Each Part
When you’ve identified the different components, take some time to learn about their functions. Transistors, for instance, amplify or switch electronic signals, capacitors store electrical energy, and resistors limit current flow. Knowing what each part does will help you understand how they all work together.
Familiarizing with the User Manual
Your kit will likely come with a user manual. Even if you’re an experienced DIY-er, it’s worth giving it a read. It will have specific pointers for the kit you’re working with and can be a useful reference as you assemble your synth.
Special Features of the DIY Synth Kit
Some synth kits come with special features, like unique inputs or sound options. Your manual should cover these, but don’t be afraid to play around and experiment – you might discover something new.
Preparation for DIY Synth Kit Assembly
Before you start assembling your synth kit, a few bits of preparation can set you up for a smoother process.
Setting Up A Suitable Workspace
A clean, well-lit workspace is key. Make sure you have plenty of room to spread out your components and tools. If possible, work on a non-static surface to protect the electronic components.
Gathering Required Tools
Most kits will require a few basic tools like a soldering iron, solder, wire cutters, and tweezers. Make sure you have everything ready before you start to ensure a smooth workflow.
Component Check and Organization
Before you start building, do a final check of all your components against the list in your manual. Organize them in a way that makes sense to you – this could save you time and confusion later on.
Safety Precautions
Just like with any electronics project, safety comes first when assembling your synth kit.
Handling Electronic Components
Handle all electronic components with care. Make sure your hands are clean and dry, and try to avoid touching any connectors or chips with your bare fingers.
Preventing Electrostatic Discharge
To prevent electrostatic discharge, which can damage electronic components, consider wearing an anti-static wrist strap. Also, remember to frequently touch a grounded metal object to discharge any built-up static electricity.
Eye Safety
Soldering can cause hot splashes, so remember to wear safety goggles. Also, avoid looking directly at the soldering iron tip as it can cause eye discomfort.
Proper Disposal of Waste Components
Dispose of any waste components safely and responsibly. Check your local laws for how to dispose of electronic waste.

Step-by-Step Guide to Assembling the DIY Synth Kit
Now, let’s move on to the fun part: assembling your synth kit!
Soldering Components
Start by soldering your components to the circuit board. Make sure to solder on the back of the board, where the copper traces are. Be patient and let each solder joint cool before moving on.
Connecting the Circuits
Next, connect your circuits. Depending on your kit, this could involve plugging in connectors, soldering wires, or even programming a microcontroller.
Placing Switches and Knobs
Once your circuits are connected, it’s time to fit any switches or knobs. These will typically slot into precut holes on the circuit board and will need to be fixed in place with screws or solder.
Setting Up the Oscillator
An oscillator is the heart of any synth, creating the tones that you’ll modulate to make your sounds. Setting up the oscillator could involve fitting a chip or module, or it might require more complex assembly.
Connecting the Output
Finally, you’ll need to attach your output – this could be a speaker, headphones, or an amplifier. Again, refer to your manual for specific instructions.
Troubleshooting Common Assembly Issues
Sometimes, things don’t go as planned. Here’s how to troubleshoot some common issues.
Dealing with Non-Functioning Components
If your synth isn’t working and you suspect a component might be the issue, try replacing it with an identical part to see if that fixes the problem.
Resolving Power Issues
No power? Check your power supply unit and make sure all your connections are solid. If all else fails, try a different power source.
No Sound Output and Possible Fixes
No sound? Check your output connections. Also, make sure your oscillator is correctly set up and powered.
Understanding and Fixing Soldering Issues
Bad solder joints can cause many issues. If you see any weak or broken joints, fix them by re-heating the solder and allowing it to reflow.
Fine Tuning your Synth
Now that your synth is up and running, it’s time to fine-tune it for the best performance.
Adjusting Outputs and Inputs
Use your switches or knobs to experiment with different input and output levels. Listen to the changes and tweak until you’re happy.
Calibrating the Oscillator
Your oscillator might need calibrating – consult your manual to see how it’s done.
Modifying Sound Levels
Experiment with modifying the sound levels. Play around until you find a mixture that suits your taste or the style of music you want to create.
Practical Tips for Using Your DIY Synth
Finally, here are a few tips for getting the most out of your synth.
Maintenance Tips
Keep your synth clean and free of dust. Store it in a cool, dry place when you’re not using it.
Tips to Enhance Sound Quality
Try playing with the settings on your synth and add-ons. Different settings can dramatically alter the sound that your synth produces. It’s all about experimenting.
Useful Hacks for Optimal Performance
Try chaining multiple synths together for a richer sound, or connect your synth to a computer to incorporate digital sounds. The possibilities are endless!
Expanding Your DIY Synth
As you become more comfortable with your synth, you might want to start expanding its capabilities.
Introduction to Add-Ons and Modifications
There are countless add-ons and mods available for synths, from different oscillators and filters to MIDI inputs and programming interfaces. These can dramatically expand the range of sounds you can create.
How to Upgrade Your Synth
If you’re ready for a bigger challenge, consider upgrading your synth. This could involve adding new components, rearranging circuits, or even building a larger, multi-oscillator synth from scratch.
Where to Find Synth Expansion Resources
There are many online communities, blogs, and retailers that cater to synth enthusiasts. These can be great places to find inspiration, new components, and advice.
Advanced DIY Synth Projects
Once you’ve mastered the basics, why not try your hand at some advanced projects?
Creating Custom Sounds
Exploring the world of custom sounds is a great next step. Whether it’s recreating the sounds of iconic synths or experimenting with completely unique tones, the sky’s the limit.
Using a Synth in Music Production
Synths are a key part of many genres of music. Learning how to incorporate your DIY synth into your music production can open up a world of possibilities.
Incorporating Other Instruments into the Synth
Synths can be combined with almost any other instrument. Whether it’s integrating a synth into a guitar or adding synth modules to a drum machine, there are many exciting possibilities.
Becoming Part of the Synth Community
Finally, let’s talk about how you can become part of the wider synth community.
Engaging with Other Synth Enthusiasts
Connecting with other synth enthusiasts can be inspiring and enlightening. Whether it’s sharing your latest mod or asking for advice, you’re likely to find the community very welcoming.
Joining Local and Online Synth Communities
There are local and online communities for synth enthusiasts everywhere. These can range from small local clubs to massive online forums. Take a look – you’re sure to find one that suits you.
Participating in Synth-Building Competitions
Ready to test your skills? Try entering a synth-building competition. It’s a great way to push yourself, learn new techniques, and meet like-minded people.
Attending Synth Workshops and Events
Workshops and events are other great ways to learn and connect. These might range from casual meetups to professional workshops and symposiums. They can be a great way to learn, share, and have fun.
Remember, everyone starts somewhere, and the journey is what makes DIY synth building so rewarding. Happy building!
Leave a Reply